Cloudflare R2 Screenshot Upload
Use AddScreenshots to funnel real-time or bulk captures into Cloudflare R2 buckets. Store screenshots, HTML, and diff baselines inside your Cloudflare tenancy while keeping every capture powered by no-throttle rendering.
- S3-compatible auth: Provide R2 account IDs and access keys to authenticate uploads securely.
- Flexible patterns: Control folder and filename structures, metadata, and storage templates for repeat runs.
- Automation ready: Pair with scheduling, webhooks, and change detection to build compliance archives or monitoring pipelines.
How to upload images to your Cloudflare R2 Bucket
The following parameters are available when uploading screenshots to your R2 bucket.| Parameter | Required | Description |
|---|---|---|
| r2 | Required | The name of the bucket |
| r2_account_id | Required | Your Cloudflare account ID. Refer to Cloudflare's Find zone and account IDs documentation. For example: https://YOUR_ACCOUNT_ID.r2.cloudflarestorage.com |
| r2_access_id | Required | Your R2 Access ID (Secret Access ID). Refer to Cloudflare's R2 Authentication documentation. |
| r2_access_key | Required | Your R2 Access Key (Secret Access Key). Refer to Cloudflare's R2 Authentication documentation. |
| file | Optional | The name or pattern for the file without the extension The default is a unique identifier (see pattern examples) |
| folder | Optional | The folder name or pattern for the file (see pattern examples) |
| html | Optional | When set to true, the HTML markup will be uploaded too |
How to setup a Cloudflare R2 Bucket and Access
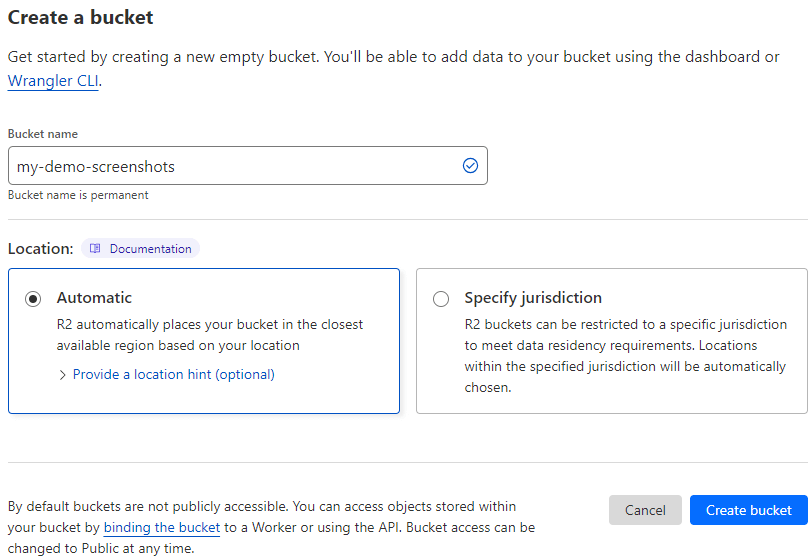
Login to Cloudflare and create a new bucket such as "my-demo-screenshots" from the R2 left side menu: 
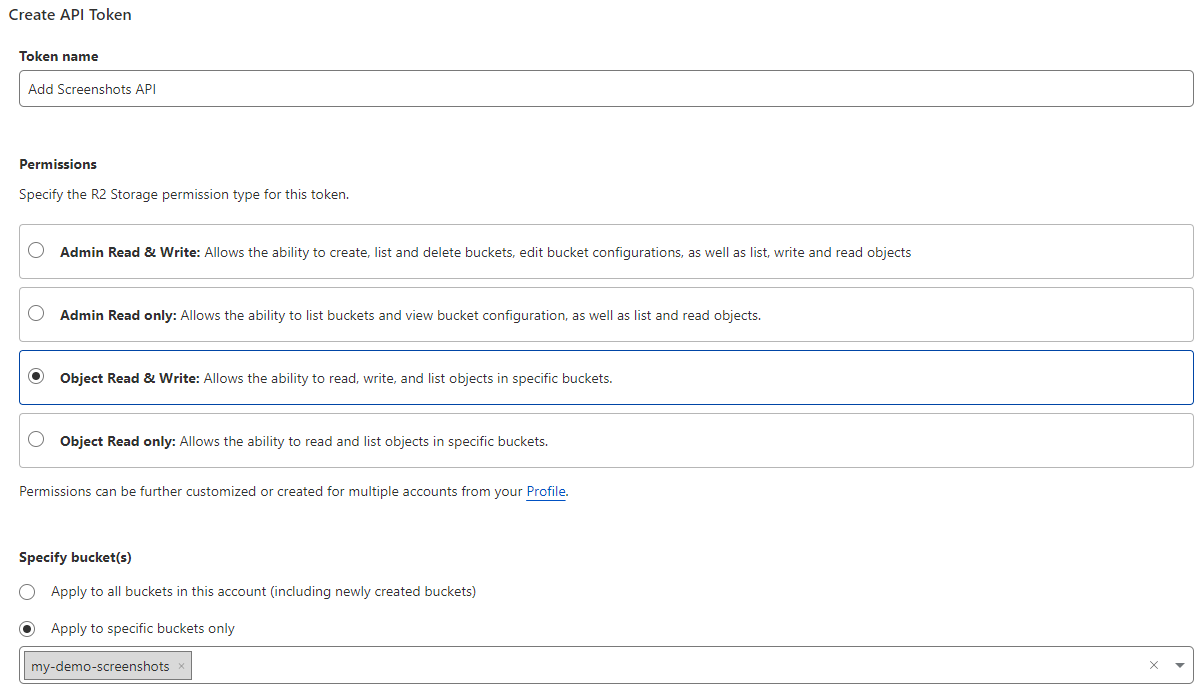
Create an API token such as "Add Screenshots API" with the "Object Read & Write" permission: 
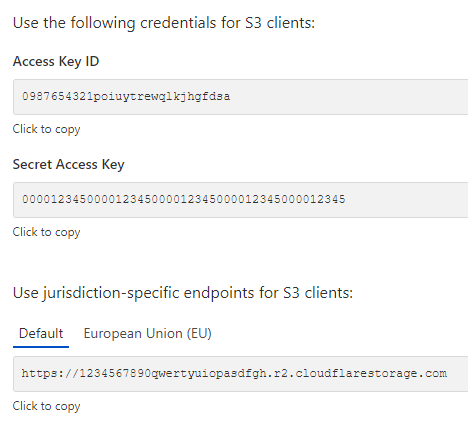
Record the Access Key ID, Secret Access Key and Account ID (from the URL): 
Upload a single screenshot to Cloudflare's R2 Storage (real-time GET request)
The example below shows how to take a real-time website screenshot and store the image in an R2 bucket "my-demo-screenshots" in the "images" folder with the file name "website.png". The optional &html=true parameter will upload the "website.html" file to the R2 bucket as well.
// Line breaks added for readability https://api.addscreenshots.com/screenshots
?apikey=YOUR_API_KEY
&r2=my-demo-screenshots
&r2_account_id=1234567890qwertyuiopasdfgh
&r2_access_id=0987654321poiuytrewqlkjhgfdsa
&r2_access_key=000012345000012345000012345000012345000012345
&folder=images
&file=website
&html=true
&url=https://www.youtube.com
Your API key can be found on the API Keys page. Need an API Key? Sign up to get started.
For internal applications, replace YOUR_API_KEY with your own unique API Key.
For public facing websites or hotlinks, generate a signed URL.
The API response will include a link to the screenshot in your S3 bucket as shown below:
{
  "success": true,
  "message": "Screenshots completed.",
  "storage_provider": "r2",
  "images": [
    {
      "folder": "images",
      "file": "website.png",
      "request_url": "https://www.youtube.com",
      "page_url": "https://www.youtube.com/",
      "image_url": "https://my-demo-screenshots.1234567890qwertyuiopasdfgh.r2.cloudflarestorage.com/images/website.png",
      "html_url": "https://my-demo-screenshots.1234567890qwertyuiopasdfgh.r2.cloudflarestorage.com/images/website.html"
    }
  ]
}
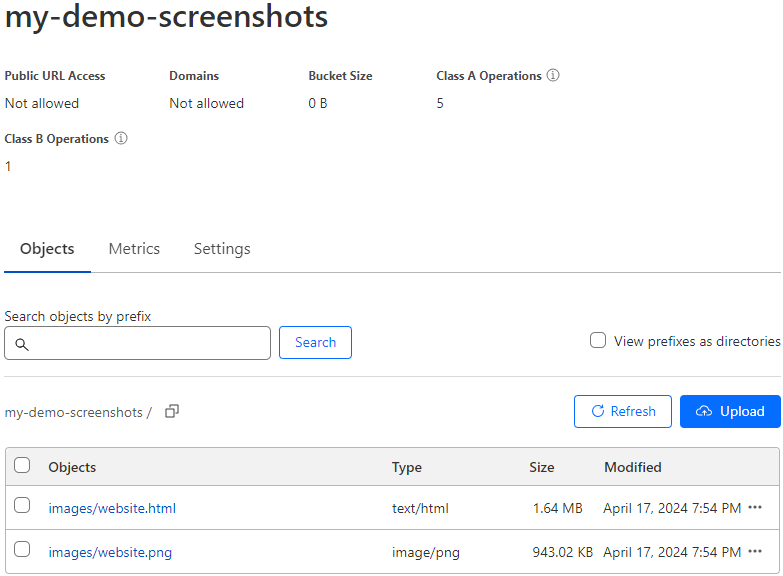
The folders and file names as they appear in R2 storage: 
Bring your screenshot archive into Cloudflare R2 now. Compare plans or generate an API key to start uploading from your next capture.