Website Screenshot Automation for Repeatable Workflows
Website screenshot automation with Add Screenshots lets teams interact with pages, capture authenticated states, and deliver proofs automatically. Pre and post activities, scheduling, and diff comparisons run at scale with no throttling, 20+ global regions, and direct exports to your preferred cloud storage.
Start Automating for Free or Compare Pricing Plans
Key Benefits of Screenshot Automation
Manual captures slow teams down. Add Screenshots orchestrates end-to-end website screenshot automation so you can fill forms, click menus, wait for components, and capture the exact state that matters—while screenshots route to S3, Azure, Google Cloud, Cloudflare R2, or email in seconds.
- No throttling or rate limits: Automations run concurrently across large URL lists without waiting for capacity.
- 20+ global capture regions: Validate localized experiences and regulatory banners from the vantage points your customers see.
- Direct cloud delivery: Send every screenshot, diff, or HTML capture straight to AWS S3, Azure Blob Storage, Google Cloud, or Cloudflare R2.
- Improved accuracy: Automation reduces manual repetition errors and captures the same workflow every time.
- Saves time: Build once and run screenshots hourly, daily, or on demand without manual intervention.
- Change detection built in: Pair automation with visual diff alerts to highlight what changed after each run.
Use the Automate tab on your website request template or the request builder on the home page (Click Advanced) to define the interactive activities to perform on the website.
You don't need to be a developer to perform basic website automation. Use a website template to define automation steps and combine it with scheduling for an end-to-end solution; eliminating repetitive tasks such as searching for the latest prices or reviewing competitor websites on an hourly, daily, or weekly basis.
View the step-by-step examples:
- Step-by-step instructions to interact with a website using automation
- How to Take Screenshots of Pages Behind a Login
- How to Interact with an iFrame
There are two main types of activities, Pre-Activities and Post-Activities.
Pre-Activities
Pre-activities are useful when website interaction is required prior to visiting the website to take a screenshot of, such as navigating to and logging into a secure website, creating an account, or searching for a hotel.
Post-Activities
Post-activities are useful when website interaction is required after the page has loaded, such as clicking on a menu item, hovering over an area, or taking a screenshot of a specific section of the website.
List of Activities
The following activities are available:
- Navigate to a website URL (e.g. a login page)
- Click on an element (e.g. a button, menu)
- Type text into an element (e.g. an input box)
- Press a key on the keyboard (e.g. Press Enter)
- Select an item from a drop-down list (e.g. Select a country)
- Hide an element from the page (e.g. Hide a menu or adverts)
- Hover over an element on the page (e.g. Area to highlight)
- Focus on an element on the page (e.g. Scroll to the pricing area)
- Wait in milliseconds (e.g. Wait for the page to load)
- Wait For an element to appear in milliseconds
- iFrame to interact with (e.g. Interact with a child iframe page)
- Fetch properties from the page (e.g. Retrieve the title or price text from a page)
View the element selection page to see examples of how to identify a website element to interact with.
Example 1: Step-by-step Instructions to Interact with a Website Using Automation
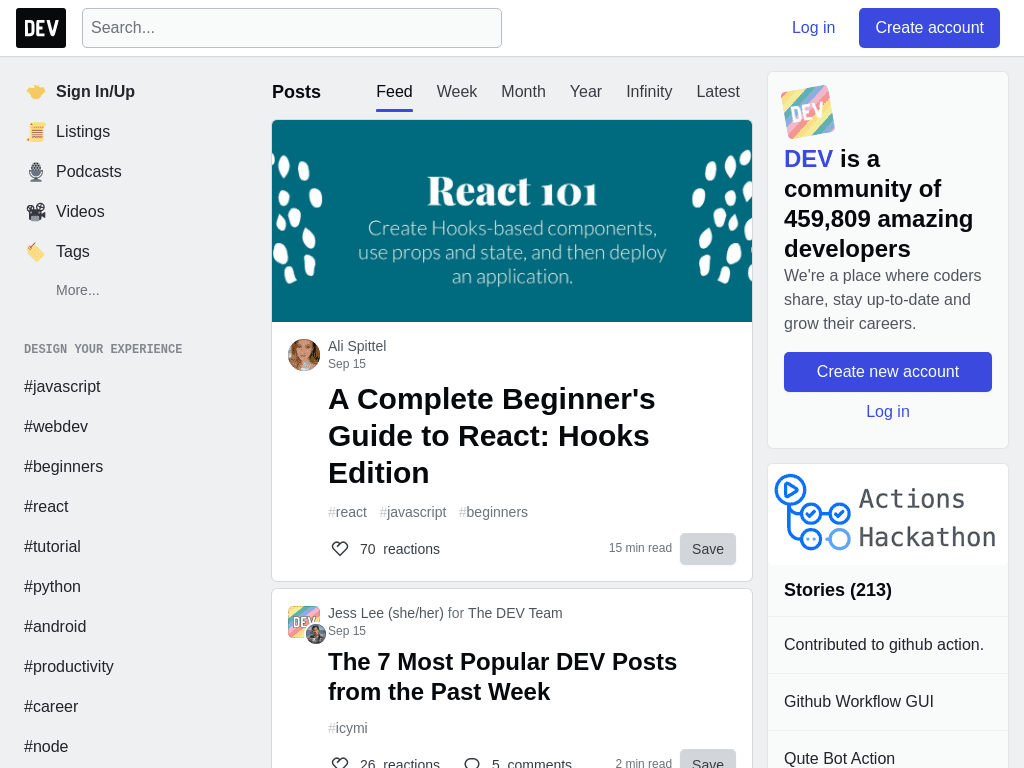
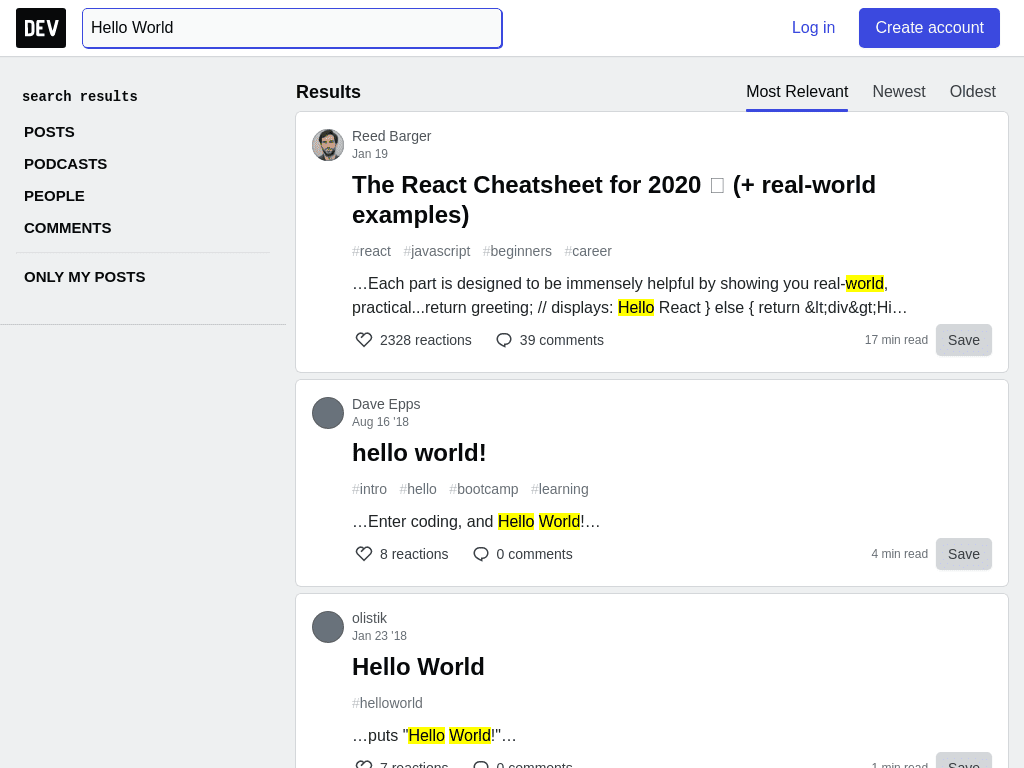
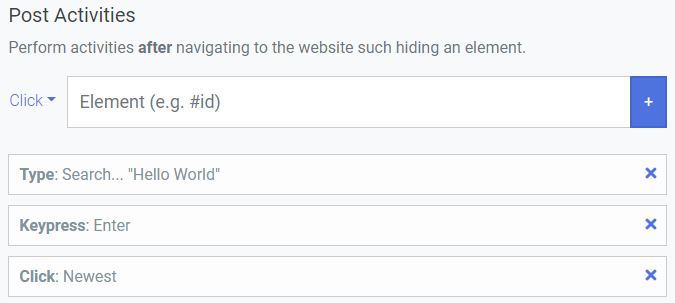
In the following example, we will use Post-Activities to interact with the https://dev.to/ website by searching for "Hello World" and clicking on the "Newest" tab on the search results page.
1. Let's start by visiting the website (https://dev.to/):
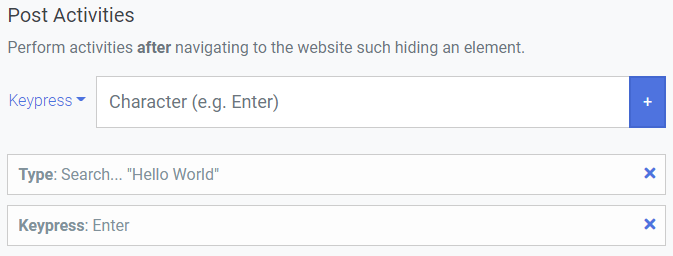
2. Create a Post Activity to type "Hello World" in the "Search..." text field:

3. Create a Post Activity to press the "Enter" key on the keyboard:
4. Create a Post Activity to click on the "Newest" tab:
The final result:
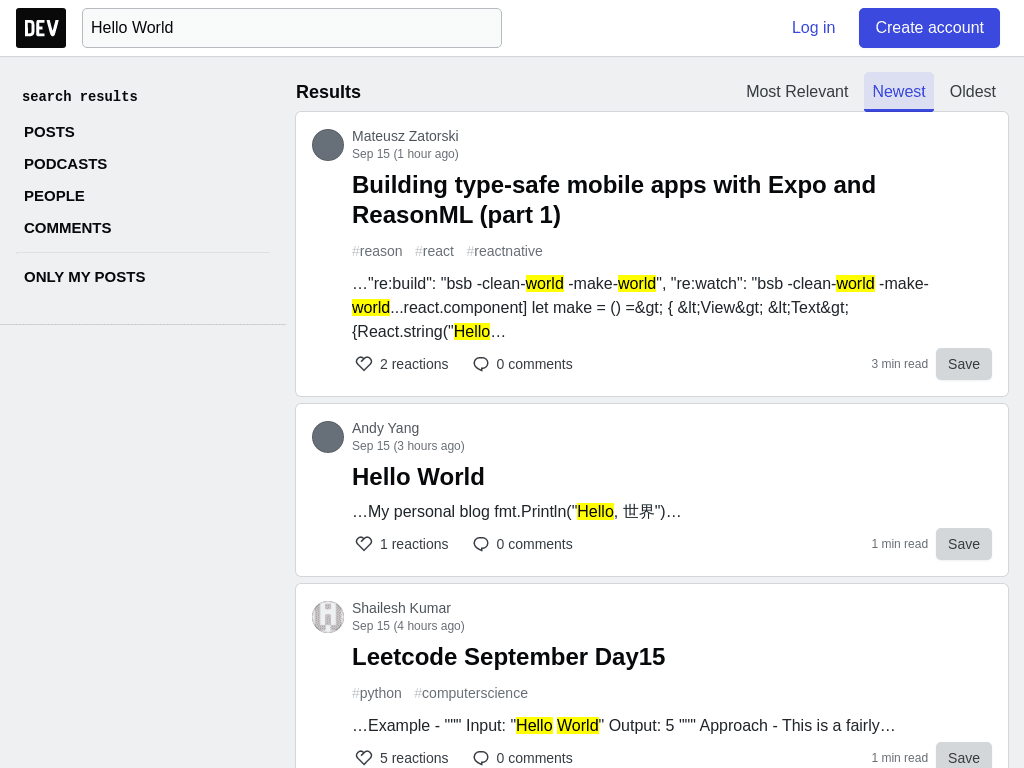
Here are the technical details to replay the login request using the website screenshot API:
POST https://api.addscreenshots.com/screenshots?apikey=YOUR_API_KEY

{
  "url": "https://dev.to",
  "viewport": "1024x768",
  "quality": "80",
  "activities_after": [
    {
      "type": "Hello World",
      "element": "Search..."
    },
    {
      "keypress": "Enter"
    },
    {
      "click": "Newest"
    }
  ]
}
Your API key can be found on the API Keys page. Need an API Key? Sign up to get started.
For internal applications, replace YOUR_API_KEY with your own unique API Key.
For public facing websites or hotlinks, generate a signed URL.
Example 2: How to Take Screenshots of Pages Behind a Login
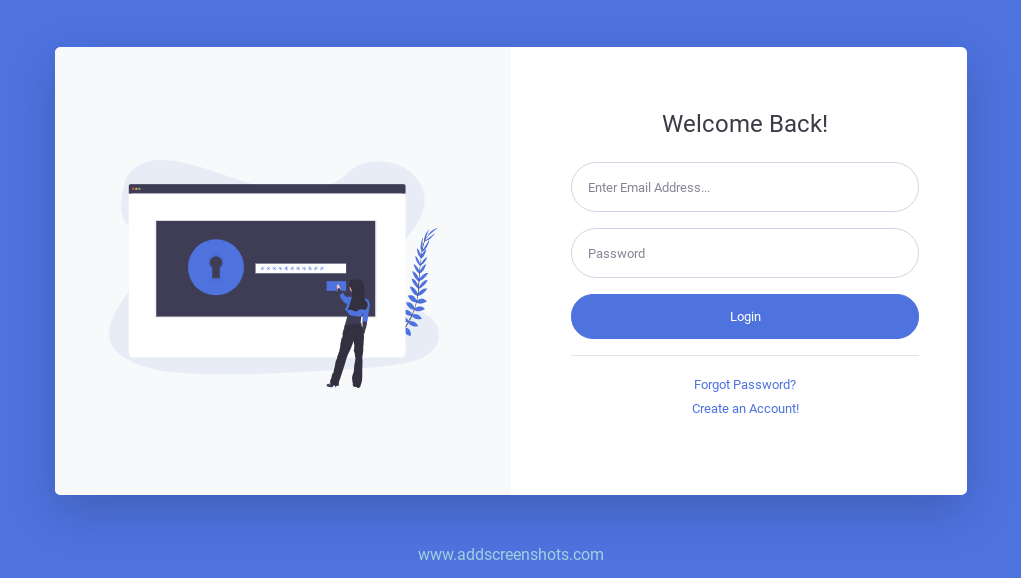
In the following example we will use Pre-Activities to navigate to a login page (https://app.addscreenshots.com/login), fill in our credentials and complete the login. Once we're logged in, we will navigate to the Storage Account page (https://app.addscreenshots.com/storage).
1. First, navigate to the login page of the website.
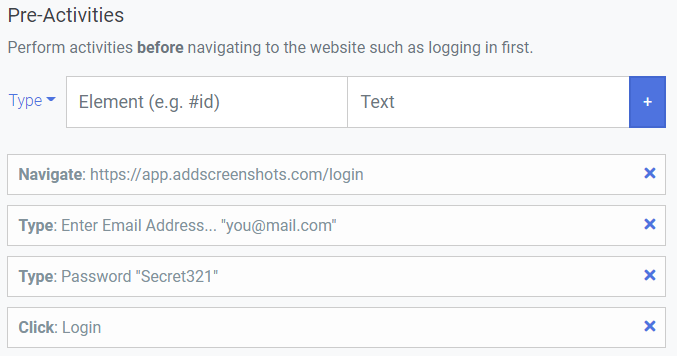
2. Automate the website login using Pre-Activities to:
a) Navigate to the login page,
b) Type "[email protected]" in the text field with the placeholder "Enter Email Address...",
c) Type "Secret321" in the password field with the placeholder "Password",
d) Click on the element with the "Login" text
The final result:
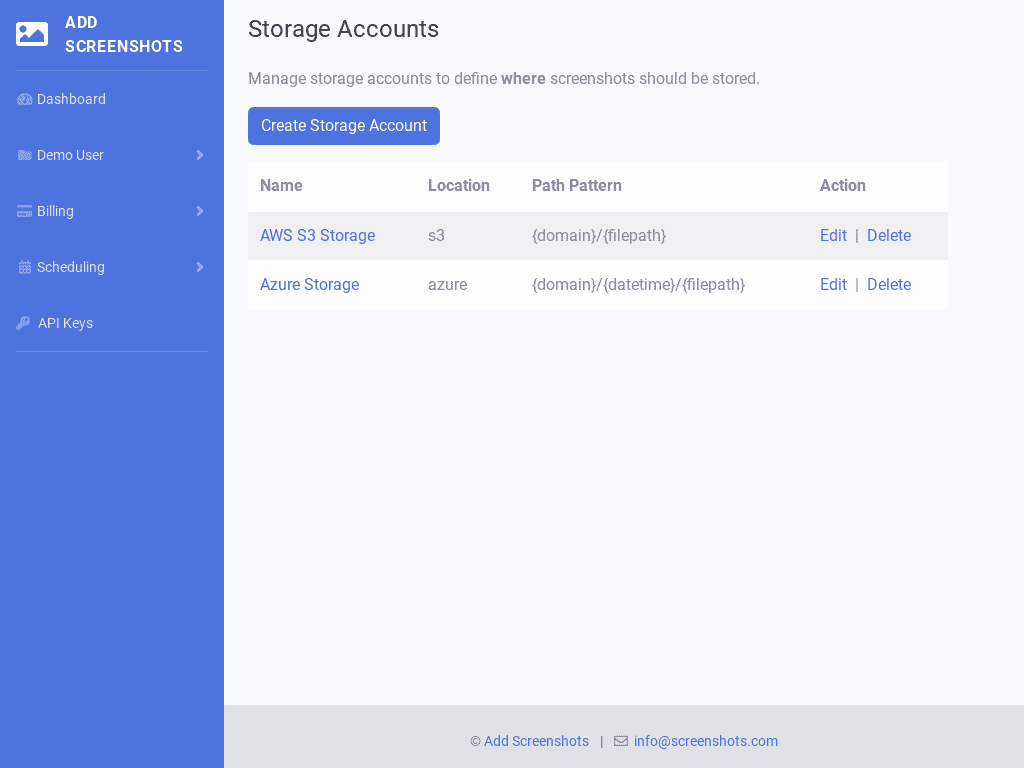
Here are the technical details to replay the search request using the Screenshot API:
POST https://api.addscreenshots.com/screenshots?apikey=YOUR_API_KEY

{
  "url": "https://app.addscreenshots.com/storage",
  "viewport": "1024x768",
  "quality": "80",
  "activities_before": [
    {
      "navigate": "https://app.addscreenshots.com/login"
    },
    {
      "type": "[email protected]",
      "element": "Enter Email Address..."
    },
    {
      "type": "Secret321",
      "element": "Password"
    },
    {
      "click": "Login"
    }
  ]
}
Example 3: How to interact with an iFrame
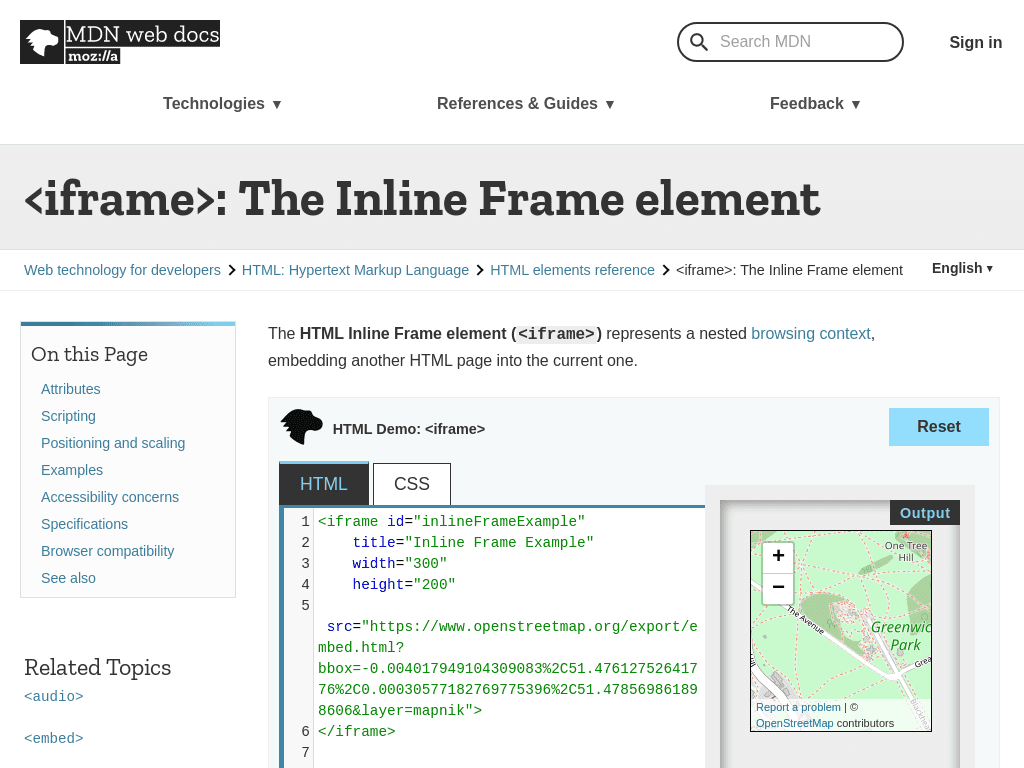
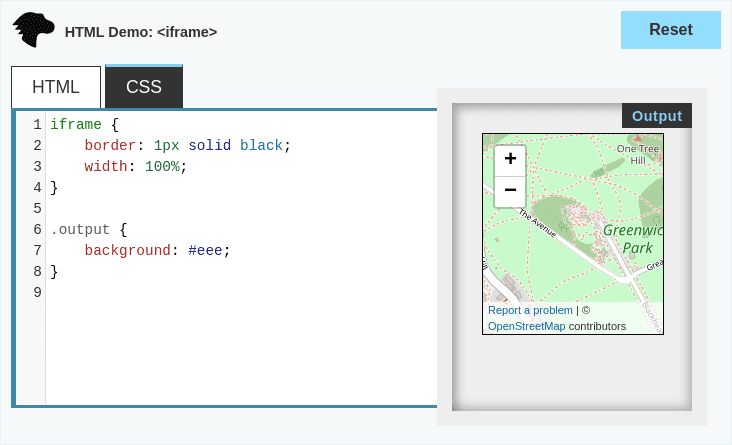
In the following example we will use Post-Activities to interact with an iFrame (child page) on the https://developer.mozilla.org/en-US/docs/Web/HTML/Element/iframe website by clicking on a menu item and only selecting the iFrame in the final screenshot.
1. Let's start by visiting the website:
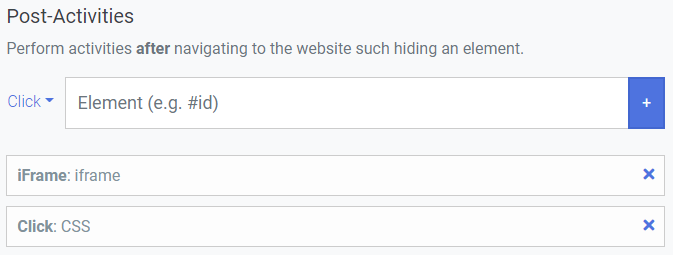
2. Create a Post Activities to:
a) select the "iFrame" (make it the active document to interact with),
b) click on the "CSS" menu and
c) set the section to "iframe" (only show the iframe section)
The final result:
Here are the technical details to replay the iframe interaction request using the Screenshot API:
POST https://api.addscreenshots.com/screenshots?apikey=YOUR_API_KEY

{
  "url": "https://developer.mozilla.org/en-US/docs/Web/HTML/Element/iframe",
  "viewport": "1024x768",
  "wait": "250",
  "section": "iframe",
  "quality": "80",
  "activities_after": [
    {
      "iframe": "iframe"
    },
    {
      "click": "CSS"
    }
  ]
}